
Plants
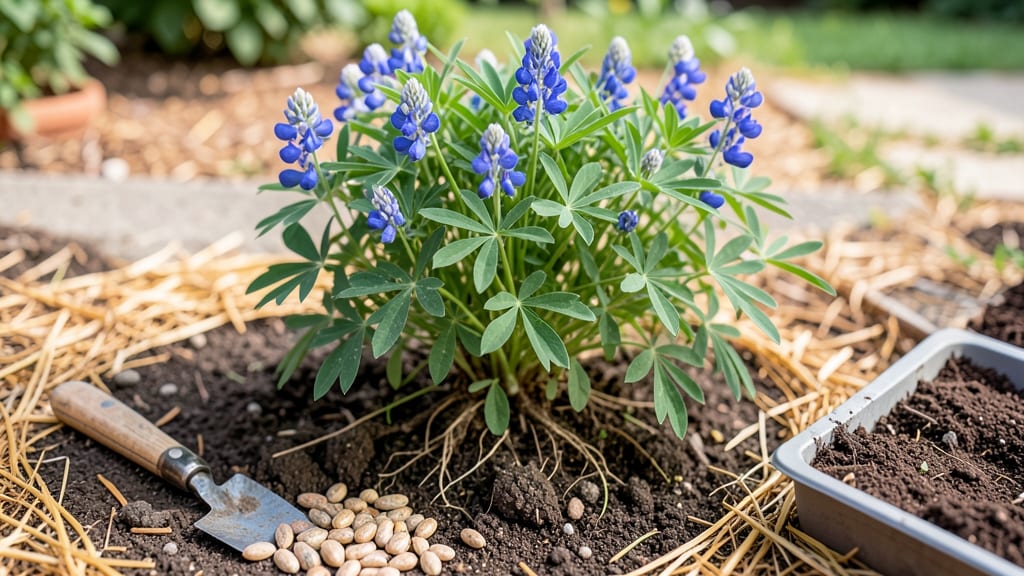
If you want those iconic North Texas fields bursting with bluebonnet 🌸 come spring, when to plant bluebonnet seeds in North Texas is the key to success. Planting too early or late can leave you with patchy blooms—or worse, no flowers at all.
The secret lies in understanding the perfect fall window when soil temps and moisture align just right for these hardy wildflowers.
Most gardeners in USDA Zone 8a know the magic happens between late September and early November, but why? It’s all about giving those tiny seeds the ideal conditions to germinate before winter sets in.
Too soon, and they’ll dry out; too late, and frost will stall their growth. I’ll break down the exact schedule and soil prep tricks to ensure your bluebonnets thrive.
You don’t need fancy equipment—just a little patience and the right techniques. From scarifying seeds to choosing the best planting spots, these steps will set you up for a vibrant spring display that’ll make your neighbors green with envy.
Let’s dive into the game-changer details that’ll turn your garden into a bluebonnet paradise.
Whether you’re a first-time planter or a seasoned gardener, this guide will help you avoid common mistakes and maximize your chances of success. By the time those March blooms arrive, you’ll be the one everyone asks for tips from. Ready to get started?
Optimal bluebonnet planting timeline in North Texas by month
Timing is everything when planting bluebonnet seeds in North Texas, where fall temperatures and first frost dates create the perfect window for germination. The ideal planting window spans from late September through early November, aligning with cooler soil temperatures and natural moisture cycles.
This schedule ensures seeds germinate in early spring, just as daylight hours increase—triggering vibrant blooms by March.
North Texas falls in USDA Zone 8a, where the average first frost hits around November 15. Planting too early (before September) risks seeds sprouting prematurely, only to be killed by summer heat.
Conversely, waiting until December or later delays germination until late spring, reducing bloom time. Aim for that golden window between frost and soil cooling.
Here’s how to align your planting with North Texas’ seasonal rhythms for maximum success:
| Month | Best Planting Time | Soil Temp (°F) | Moisture Needs | Notes |
|---|---|---|---|---|
| Late September | Early September (after 75°F) | 65–75°F | Moderate (natural rain) | Ideal for early germination |
| October | Mid-October peak | 55–65°F | Low (dry conditions) | Best balance of moisture |
| November | Early November (before frost) | 45–55°F | Minimal (dormant seeds) | Last chance for spring blooms |
For gardeners in North Texas cities like Dallas or Fort Worth, microclimates can shift frost dates by 1–2 weeks. Check your local Cooperative Extension Service for precise frost predictions. Urban areas often experience earlier frosts due to concrete heat absorption, so plant 1–2 weeks earlier than rural zones.
Adjust your schedule if unseasonable warmth lingers into October. If soil stays above 70°F past mid-October, delay planting until temperatures drop. Use a soil thermometer to monitor conditions—ideal germination occurs at 60–70°F.
Pro tip: Plant after a light rain to ensure seeds make contact with moist soil without washing away.
If you miss the fall window, spring planting is possible but risky. Sow seeds in February only if you’re prepared for hand-watering during dry spells. Spring-planted bluebonnets often bloom later and produce fewer flowers due to competition with weeds and limited root establishment before summer heat arrives.
For large-scale plantings, like roadside medians or fields, aim for mid-October when soil moisture is consistent. Smaller garden plots can handle late September or early November plantings, but monitor for early freezes.
A light mulch (like straw) after planting helps retain moisture and protect seeds from erratic temperature swings.
Remember: Bluebonnets thrive on patience. Seeds may take 2–3 years to reach full bloom potential, but proper fall planting ensures a low-maintenance, drought-resistant display for decades. Once established, they’ll self-seed and multiply, creating those iconic blue wildflower carpets North Texas is famous for.
🌸
Pre-planting soil and seed preparation for bluebonnets
Before scattering those bluebonnet seeds, proper soil prep and seed treatment can make the difference between a sparse patch and a lush carpet of blooms. North Texas’ clay-heavy soils often need amendments to improve drainage and fertility.
Start by testing your soil’s pH level—bluebonnets thrive in slightly acidic to neutral soil, ideally between 6.0 and 7.5. If your soil is too alkaline, a light application of sulfur can help adjust it over time.
Next, focus on loosening the soil to a depth of 4-6 inches. Bluebonnets have shallow roots, so compacted soil will stunt their growth. Use a broadfork or tilling tool to break up clumps, but avoid overworking the soil, which can disrupt its natural structure.
If your soil is particularly dense, mix in compost or aged manure to improve aeration and nutrient content. This step is especially critical in urban areas where soil may have been disturbed by construction.
Now, let’s talk seed preparation. Bluebonnet seeds have a hard outer coating that can delay germination. To speed up the process, use a technique called scarification. You can either nick the seeds lightly with sandpaper or soak them in warm water for 24 hours before planting.
This mimics natural weathering and helps water penetrate the seed coat. For even better results, try stratification: place seeds in a moist paper towel inside a sealed bag and refrigerate for 4-6 weeks. This mimics winter conditions and can double your germination rates.
🌱 Step-by-Step Seed & Soil Prep for Bluebonnets
- Test soil pH (aim for 6.0–7.5). Use a soil test kit from your local garden center.
- Loosen soil to 4–6 inches deep with a broadfork or tiller.
- Amend with compost (2–3 inches mixed into the topsoil).
- Scarify seeds: Lightly sandpaper seeds or soak in warm water for 24 hours.
- Stratify seeds (optional): Refrigerate moist seeds in a bag for 4–6 weeks.
- Choose planting site: Full sun (6+ hours daily) and well-drained soil.
When selecting your planting site, prioritize areas with full sun exposure—at least 6 hours of direct sunlight daily. Bluebonnets are drought-tolerant once established, so avoid low-lying spots where water pools. If your yard has heavy clay, consider planting on a slight slope to improve drainage.
A south-facing slope is ideal, as it gets the most sunlight and warms up faster in spring. Mark your site with stakes or spray paint to plan your seed distribution—bluebonnets look best when planted in large, dense clusters rather than scattered rows.
Finally, clear the area of weeds before planting. Bluebonnets are competitive once established, but young seedlings struggle against aggressive weeds like crabgrass or clover. Use a hoe or hand-pull weeds a few days before planting to give your seeds a clean slate.
Avoid herbicides, as they can linger in the soil and harm your bluebonnets. With your soil prepped and seeds ready, you’re one step closer to a stunning spring display that’ll make your neighbors stop and stare.
Pro tip: If you’re planting in an area with high foot traffic, like a median or parkway, consider laying down landscape fabric before scattering seeds. This will suppress weeds without blocking sunlight or moisture. Just